Showing posts with label NOTD. Show all posts

Friday, 8 March 2013

NOTD with GIVENCHY Vernis Brillant Couture

HELLO!  Today the 8th of March is International Women's day! A day dedicated to women across the world, it has been observed since the 1900s as a mark of respect for Women! I am proud of the fact that I was born a woman and wish each  and everyone of you (especially women) a very Happy International Women's day! Long live womanhood!

On this special occasion of International women's day I took time out to try out something ultra luxurious and also feel pampered and spoiled as a woman (its International women's day after all)  and so decided to paint my nails with my brand new luxurious Givenchy Vernis Brillant Couture in shade 609! I am bowled over by the royal packaging of Givenchy Vernis Brillant Couture! I admit the packaging was one of the reasons I decided to splurge on it. The varnish bottle is so eye-catching and beautiful, I just can't get my eyes off this beauty!

This nail varnish is priced on the higher side and frankly speaking is not the best deal for the price in terms of color payoff and drying time. You will need atleast three coats of this nail varnish to make it look a bit okay on nails, which is not desirable considering the high price I paid for it. It also took a while to dry and seemed to be one of the longest drying nail varnishes I have used in a long time! The color looks really pretty though - it's a pastel yellow with a pearly look, will go well with almost any outfit color in my wardrobe.


Despite a few hitches, I still love the color and would definitely wear the Givenchy Vernis Brillant Couture again :)

Sunday, 16 September 2012

Mini BarryM Haul / NOTD

HELLO! A few weeks back while shopping at a local Boots I came across a fantastic offer which was hard for me to resist! BarryM were giving away a free nail polish for a minimum purchase of £6 and I was cuffed as I really like Barry M nail paints and as it was ages since I bought any BarryM products I decided to  treat myself with some makeup goodies!

So I got myself a BarryM nail paint in Hologram (I've been lusting for this for a long time!) and a liquid eyeliner in Black as I'd just finished my old Rimmel eyeliner and wanted to try something new.

Wednesday, 15 August 2012

Independence Day Inspired Nail Polish Haul and NOTD!

HELLO! Happy Independence Day to all of my lovely Indian friends and followers!! I ordered three W7 nail polishes in Saffron, White and Green nail polishes from an online shop and they just arrived today! perfect timing, yay!

First of all lemme tell you a bit about the Indian Flag-
Indian flag is a horizontal tricolour of saffron at the top, white in the middle, and green at the bottom. In the centre, there is a navy blue wheel with twenty-four spokes, known as the Ashoka Chakra.
The saffron color represents courage and sacrifice; white – truth,peace and purity; green – prosperity; and the Ashok Chakra represents the Laws of Dharma (righteousness).

Here's a quick Nail of the Day on this Independence Day. I tried out the green nail polish today...I applied two coats and it dried pretty quickly...the quality is nice for the price I paid (£2.50)  :)


I hope you liked my Independence Day inspired haul and NOTD. Thanks for stopping by :)
p.s: Don't forget to participate in my 'ALL ABOUT EYES' giveaway!! Giveaway ends on 23rd August 2012.

Sunday, 20 May 2012

FOTD & OOTD - Robin's B'day!

HELLO! A few of my lovely readers had requested me to do a post on the makeup and complete look that I did for my brother Robin's B'day party. I'd a great time doing this look and it was a fun night-out! I'd received a lot of compliments on this look so I thought this would be a good thing to share with you all :)
FOTD and OOTD -Robin's B'day

Tuesday, 10 January 2012

New Ring/NOTD

HELLO! A new ring to wear today! Loving the pearl and multi-colour diamante cluster ring! I bought this from Forever 21. I think I'm gonna wear this with so many outfits at the moment cause it just seems to tie in to everything.
New Ring

Saturday, 22 October 2011

Fun Nail Art with Hello Kitty & Floral Stamping Nail Art Kit

HELLO!  Today I was in the mood for creating some fun nail art on my nails and so I took up my new nail konads by Born Pretty!
I'd never tried nail konads before so when I was asked to try out the Hello Kitty & Floral Stamping Nail Art Kit by the PR of Born Pretty, I went ahead with the offer as I love nail art and here is what I created using the konad for the first time! I know it has come out a bit messy but this is just the beginning and I am going to play more with this and will try to work towards refining my techinques as I go along further.

Fun Nail Art with Hello Kitty & Floral Stamping Nail Art Kit

Monday, 3 October 2011

Dot Ditty Dot- It's Polka Dots!


HELLO! Some things are timeless and never go out of style– such as Polka Dots! Yes, Polka Dots!
The history of Polka Dots goes way back and has been a staple of the fashion industry for decades. It just so  happens I love polka dots as they're classic, playful, and can be merged into any style statement.
I’ve been into polka dots for quite sometime now, Especially in clothing. I must mention though that I am not particular about the kind of polka dots I have on my clothes. I like micro dots, big huge polka dots, multi-colored dots and mixed media dots. Overall I’m just a polka dot lover, and  have to give into my love, and share it with all of you....

Polka Dot Wedge Shoes

Friday, 2 September 2011

Friday, 1 July 2011

Nail Art Using Nail Stickers

HELLO! Today I had the urge to do some new stuff on my nails, I created this simple yet cute looking design on them using nail stickers!

Nail Art Using Nail Stickers

I used the 3D nail stickers from Nail Accessory (from eBay) alongwith my Elle 18 nail polish in silver pink to create this simple nail art...
Nail Art Using Nail Stickers

I started off by applying nail polish in diagonal strokes and waited for it to dry...
Nail Art Using Nail Stickers

Then I carefully peeled off the stickers from the adhesive paper and placed them over the painted region and Volia! This is how my nails looked after finishing them off with a clear top coat.....
Nail Art Using Nail Stickers

So that was it...simple yet cute looking nails in just about 10 minutes! Hope you liked my nail art using nail stickers!

Friday, 20 May 2011

NOTD With Estee Lauder's Plum Cassis

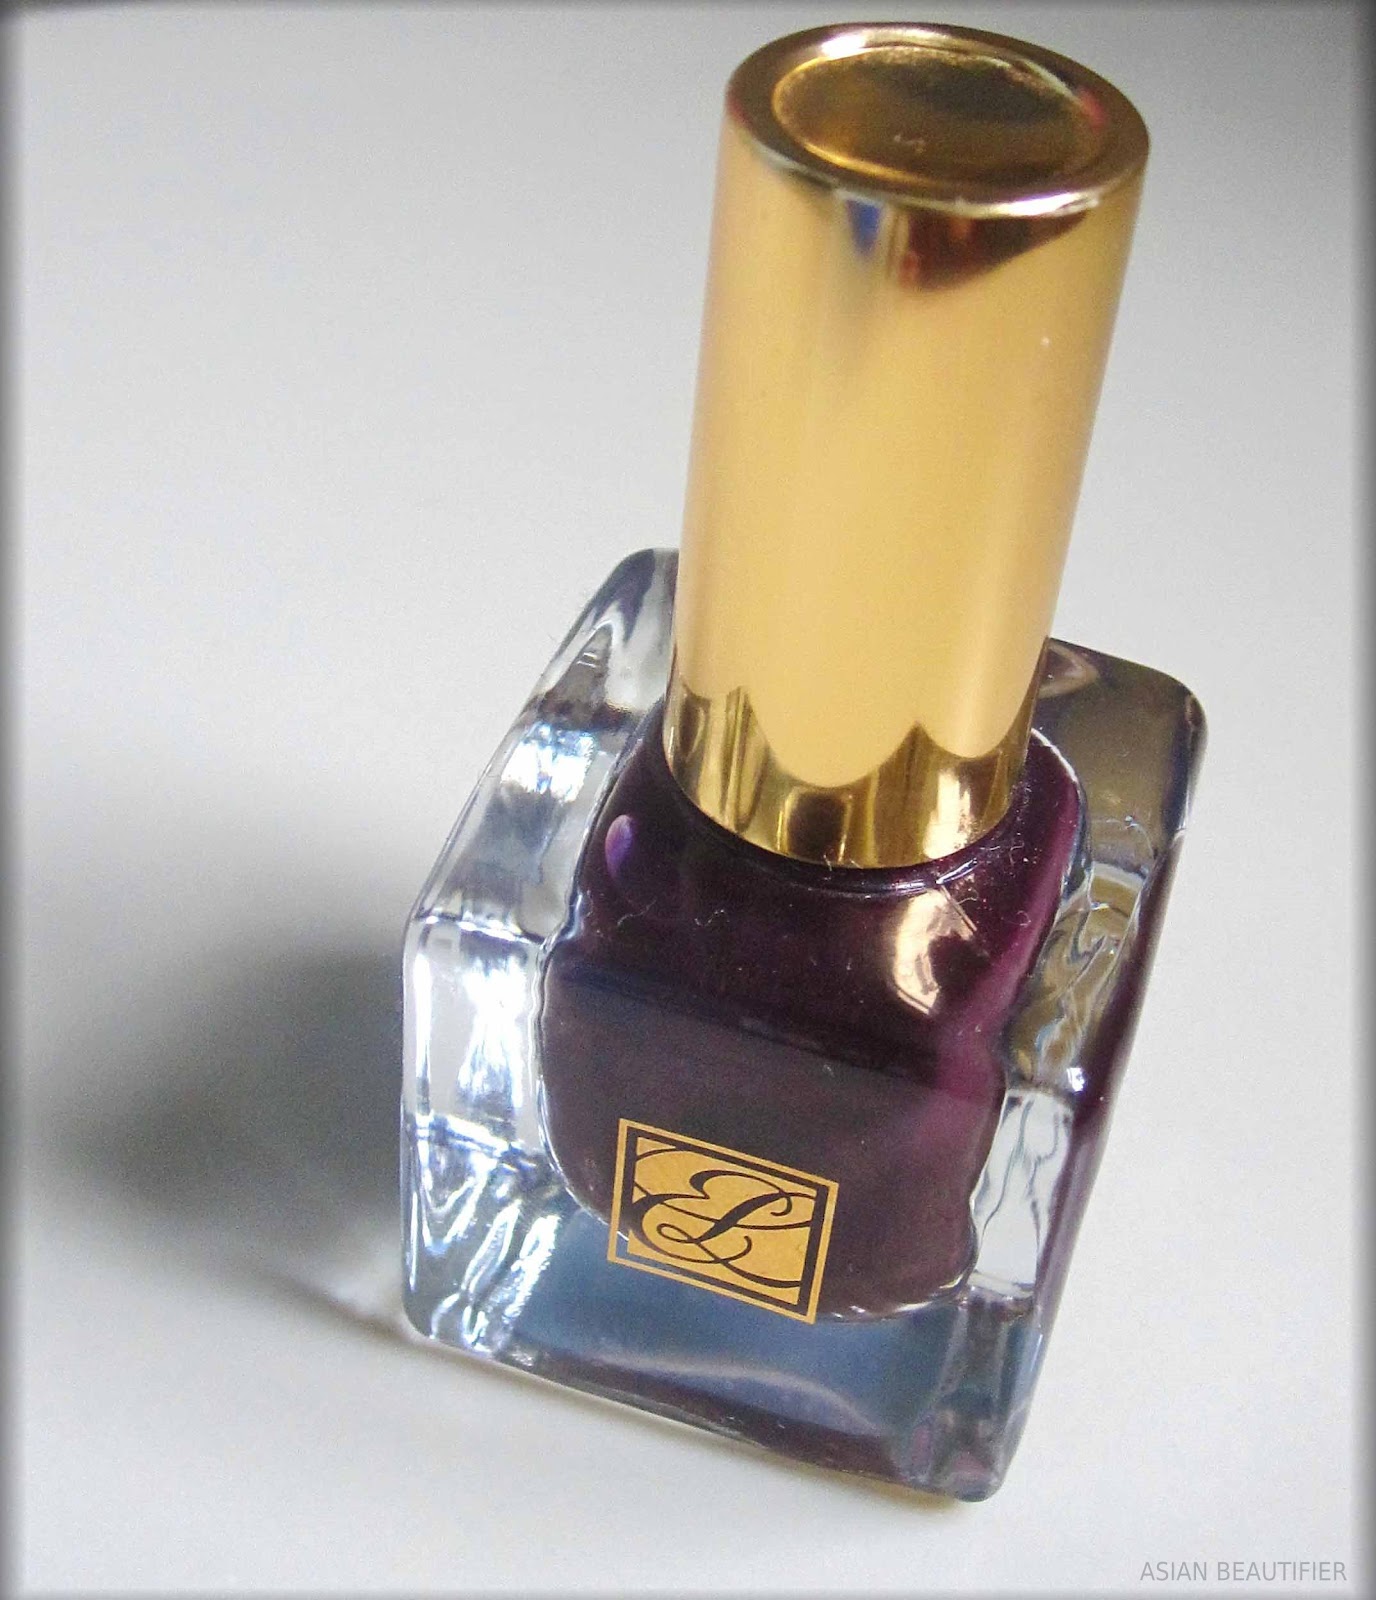
HELLO!I've been smitten by the Estee Lauder Nail paints for its ultra glamorous bottle design and Super-shine, high-performance nail lacquers!

Estee Lauder Nail Polish - Plum Cassis

The shade that I picked up for today's nail post is Plum Cassis - a gorgeous deep plumy purpley color and It's Delicious!


This shade is perfect for adding some extra drama to your nails and to go alongwith your glamorous outfits! Moreover, it goes on like a dream i.e. easy smooth and even application with a nice flat brush. Just two coats are enough to show up it's true beauty and the fact it dries up very fast is an added bonus! The pictures were taken after 4 days of wearing this nail polish and you can see the color still looks vibrant & there is no chipping so far...

Estee Lauder Nail Polish - Plum Cassis

I've had this bottle for ages and the good news is it lasts for a long time and never seems to go 'gooey' in the bottle.
This polish was quite an expensive purchase for me (around£11-£12) but it has been my all-time desire to own a nail paint from Estee Lauder and after realizing how good these nail polishes are I sure am going to add a few more shades from Estee Lauder to my nail polish kitty!


Wednesday, 2 March 2011

GIVENCHY KIWI FIZZ

HELLO. I wanted to show to you all my newly done nails with the new Givenchy Vernis Please! Kiwi Fizz nail polish!
Its a Pale Green vernish with a golden sheen, which reminds me of MAC pigment in Old Gold.
This has a sheer finish and I had to apply 3 coats of it, which was bit of a let down. Apart from that, it's a nice unusual shade, applies smoothly and could be layered up easily to attain a desirable color intensity. The drying time is just a couple of minutes and the finish is somewhat duo-chromatic.

GIVENCHY KIWI FIZZ

I bought this from Debenhams a few months ago for about 12 pounds, but never really got a chance to wear it, and this shade is presently out of stock but they have other shades in this range which I'll explore in my next shopping trip.

The bottle it came in looks really classy and elegant and I simply love the gorgeous Givenchy logo which was what really attracted me to this baby for the first time...

GIVENCHY KIWI FIZZ

So what are you gals wearing on your nails today?

Monday, 14 February 2011

Happy Valentine's day + NOTD, EOTD & a ring made by me!

Today, the 14th of February, is Valentine's Day! A day to share with one and all the most beautiful thing - Love! So I wish all of my lovely and sweet readers a Very Happy Valentine's Day and I hope all of you have day filled with lots and lots of fun and joy! Me on my part will be spending it with my loved ones and hope to make it one of the happiest days ever!

As a dedication for this day I created special V-day nails, an eyelook and a handmade ring!

Let me start of with the nails - I painted my nails with the classic Red nail polish from Nail's Inc and then added a couple of blue and yellow rhinetones on top to make them look a little bit more flashy. I dabble in nail art and it's not my forte so please excuse my somewhat messy looking nail art digits! So there it is folks the NOTD for Valentine's day!


Next the Eyelook - I wanted to keep it simple and sober but at the same time didn't want to look like a plain jane so added a bit of definition to my eyes by lining my upper lids with a black eyeliner and filling in my brows and also decided to give my eyes an extra oomph for the V-day by adding a little bit of golden glitter on the middle lid.


Finally the ring I made - Girls, I am so estatic about my new ring! it's the first ever handmade ring created by me, for myself, for the special day! I have never before created any piece of jewellery in my entire life so this ring is special for me in every way and I'm so glad that I'll be wearing it on this day!


So Guys and Gals what are your plans for Valentine's Day? Feel free to share them here!

Friday, 28 January 2011

THINK PINK!

Right now I am just thinking about Pink! No not the singer but the color! Well if you have been keeping track of the fashion and design world, you would know that PANTONE have officially announced PINK as their color for 2011 and as Pink is a classic favorite of mine I decided to dedicate it by renovating my blog with some shades of Pink! And so today's post is in honour of the color Pink!

So I start by talking about Illamasqua Loose Powder 005, which you all guessed is Pink colored, has been designed to brighten dull skin and make it look more healthy in appearance. If your skin has started to look a bit sallow, green tinged or yellow then this product will fix it! When applied on the skin, it looks translucent with no pink tones noticeable. One thing I like about it is that it's very finely milled due to which it does not look powdery or cakey on skin & also gets rid of shine so this is a perfect finishing powder to give you that airbrushed look!
Illamasqua Loose Powder 005

Now let's move onto lip balms which right now are very much in use due to the wintery weather and the one I am gonna talk about is Eyeko strawberry fat balm! It is a dual action balm in form of adding color and shimmer to your lips thereby making them look pretty and also moisturising the lips and make them soft and supple! Plus it smells of strawberry...yumm! Add a little bit of the Eyeko Lipgloss in Primerose Hill on top and you will have lips to die for! The lipgloss is a pretty pinkish brown colour and the fine gold shimmer particles in it will make your lips dazzle with shine!
Eyeko strawberry fat balm and Lipgloss in Primerose Hill

Swatched together on my lips - Eyeko Strawberry Fat Balm and Eyeko Lipgloss in Primerose Hill
Eyeko strawberry fat balm and Lipgloss in Primerose Hill

Next, the Nails Inc Instyle Candy Pink nail paint which is a lovely pink nail polish that looks great and wears well on any skintone!
Nails Inc Instyle Candy Pink

Sleek Good Girl Palette is an ultimate palette to reach for if you are planning to give your eyes some serious pink makeover! It offers a lovely variety of pink shades that are sure to give your eyes a romantic look! A special thing about this particular palette is that you could use it as a blush and highlighter palette! Yes ladies! It works great as a blush and highlighter!! Now thats what I call a truely multi functional palette!
Sleek Good Girl Palette
Onto the swatches!
Sleek Good Girl Palette

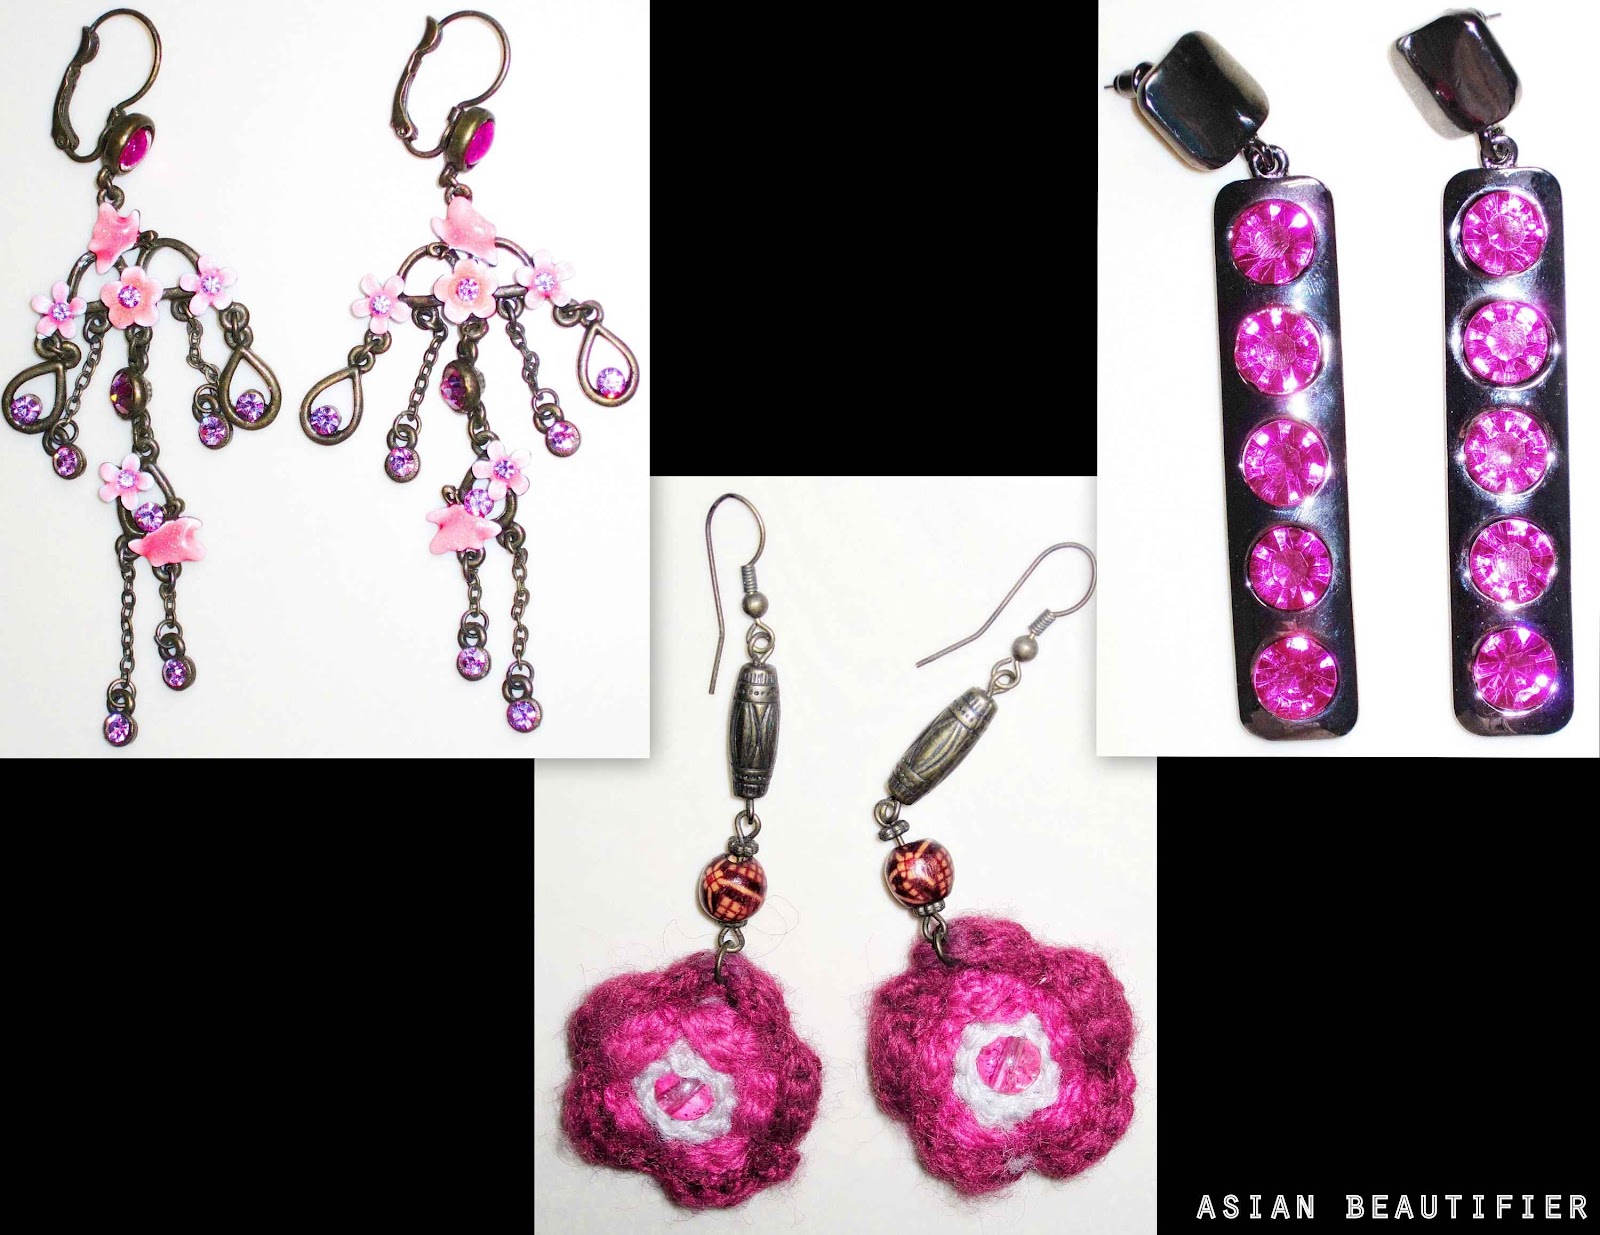
Speaking of jewellery... here are a few pink ones from my jewellery collection that I absolutely love to flaunt on my ears!
Pink Jewellery

Moving onto some hot pink shoes! These stylish peep toe heels are from brand F&F and feature a strip pattern on the front part, and have a 5 inch heel to them! Absolutely love them!
Hot Pink Shoes From F&F


That's it for now my lovelies! I leave by just repeating two words - THINK PINK!

Thursday, 7 October 2010

Simple Everyday/Glam Nail Art Designs!

Hi All!
I sometimes get bored looking at my unicolor painted nails and thats when the creative side in me goes into action and jumps into the nail art bandwagon! Ok, I admit im not really good in free hand style, I am still struggling to draw a perfect flower or a polka dot but all I can say is that there is plenty of room for improvement! So here I share with you the two DIY free hand nail art styles that I created, the first one being the simple everyday design, using 3 polishes - Nails Inc polish in Candy as a base color, Rimmel I ♥ Lasting Finish in 275 Electric and Miss Sporty Clubbing Colors in shade Fatal Plum as polka dot colors. As I didn't have the proper nail art brush to put the dots on so with a heavy heart I passed the burden to one of my eyeliner brushes!


I got a bit carried away while doing my second nail art design and ended up loading too many bling heart decorations onto my nails but boy! I am now seriously in love with my heavy duty flashy nails lol! For this one, I used the pink polish from Claire's as a base and as the polish was still tacky I sprinkled the heart decorations (that comes with the polish) over it, with a very light hand pressed them into the nail paint, waited for it to dry for about 5 minutes and after which I coated the nails with Claire's Glitter top coat paint for that added glittery effect on them.


Thats all for now, lads and ladies! Thanks for looking everyone, have a blessed day!
xoxo

Saturday, 14 August 2010

Sleek Nailed Polish

Hi all!
Boy oh Boy doesnt time fly these days? I mean I cant believe a month has already passed since I started wearing Sleek Nailed polish on my nails! Maybe it's because I enjoy wearing them so much that I dont realise time flies so quickly!
A few months back when Sleek Make Up announced the names of 30 lucky winners in their Facebook contest I was over the moon that I was one of the winners and in approximately 2 weeks time I received the prize of 4 Sleek Nailed Polishes! To add to my pleasure was the fact that these were my first ever Sleek Nail paints which arrived in beautiful pastel and vibrant shades!

Sleek Nailed Polish
I've been wearing them for quite sometime now and felt I need to update you all about them.

Sleek Nailed Polish - Lilac
Sleek Nailed Polish in Lilac is my current fav! A nice pastel llilac shade that needs just 1 to 2 coats for its true opacity. I wore this shade on my bday and it looked really pretty. This polish is a joy to wear, it glides smoothly on my nails and lasts for a good few days without any tip wear.

Sleek Nailed Polish - Florida
Sleek Nailed Polish in Florida. A bright, almost fluorescent orange shade that is sure to catch the crowd's attention! My camera went through a tough time capturing the true color of this shade as they came out looking yellowish in almost every snap I clicked! Anyway, this shade is not for the faint hearted ones out there! The formula of Florida is ok and it needs atleast 3 coats to show of decently on nails.

Sleek Nailed Polish - Pastel Pink
Sleek Nailed Polish in Pastel Pink. A baby pink shade that looks really pretty and girly on nails! Sadly, the formula of Pastel Pink is a bit of a shame, it was chalky, streaky and drying and was hard to glide on my nails and needed aleast 3 coats for full opacity.

Sleek Nailed Polish - Turquoise
Sleek Nailed Polish in Turquoise.This polish is a nice change from all the pinks and reds that dominate the nail polish society. Its a bright turquoise shade, glides on smoothly and gives a creamy finish. I'm pretty happy with its formula, all it needs is just 2 coats to show its true color.

Overall, I am pretty happy with these polishes, Sleek Nailed Paints are available in 29 shades and for just £3.49 per polish, these are definitely worth checking out.

Any of you tried Sleek Nail paints or planning to? Let me know if you can! Would love to hear your views!


Tuesday, 13 July 2010

Nail Art With Eyeko Rain and Eyeko Saucy Polish

Hey All!
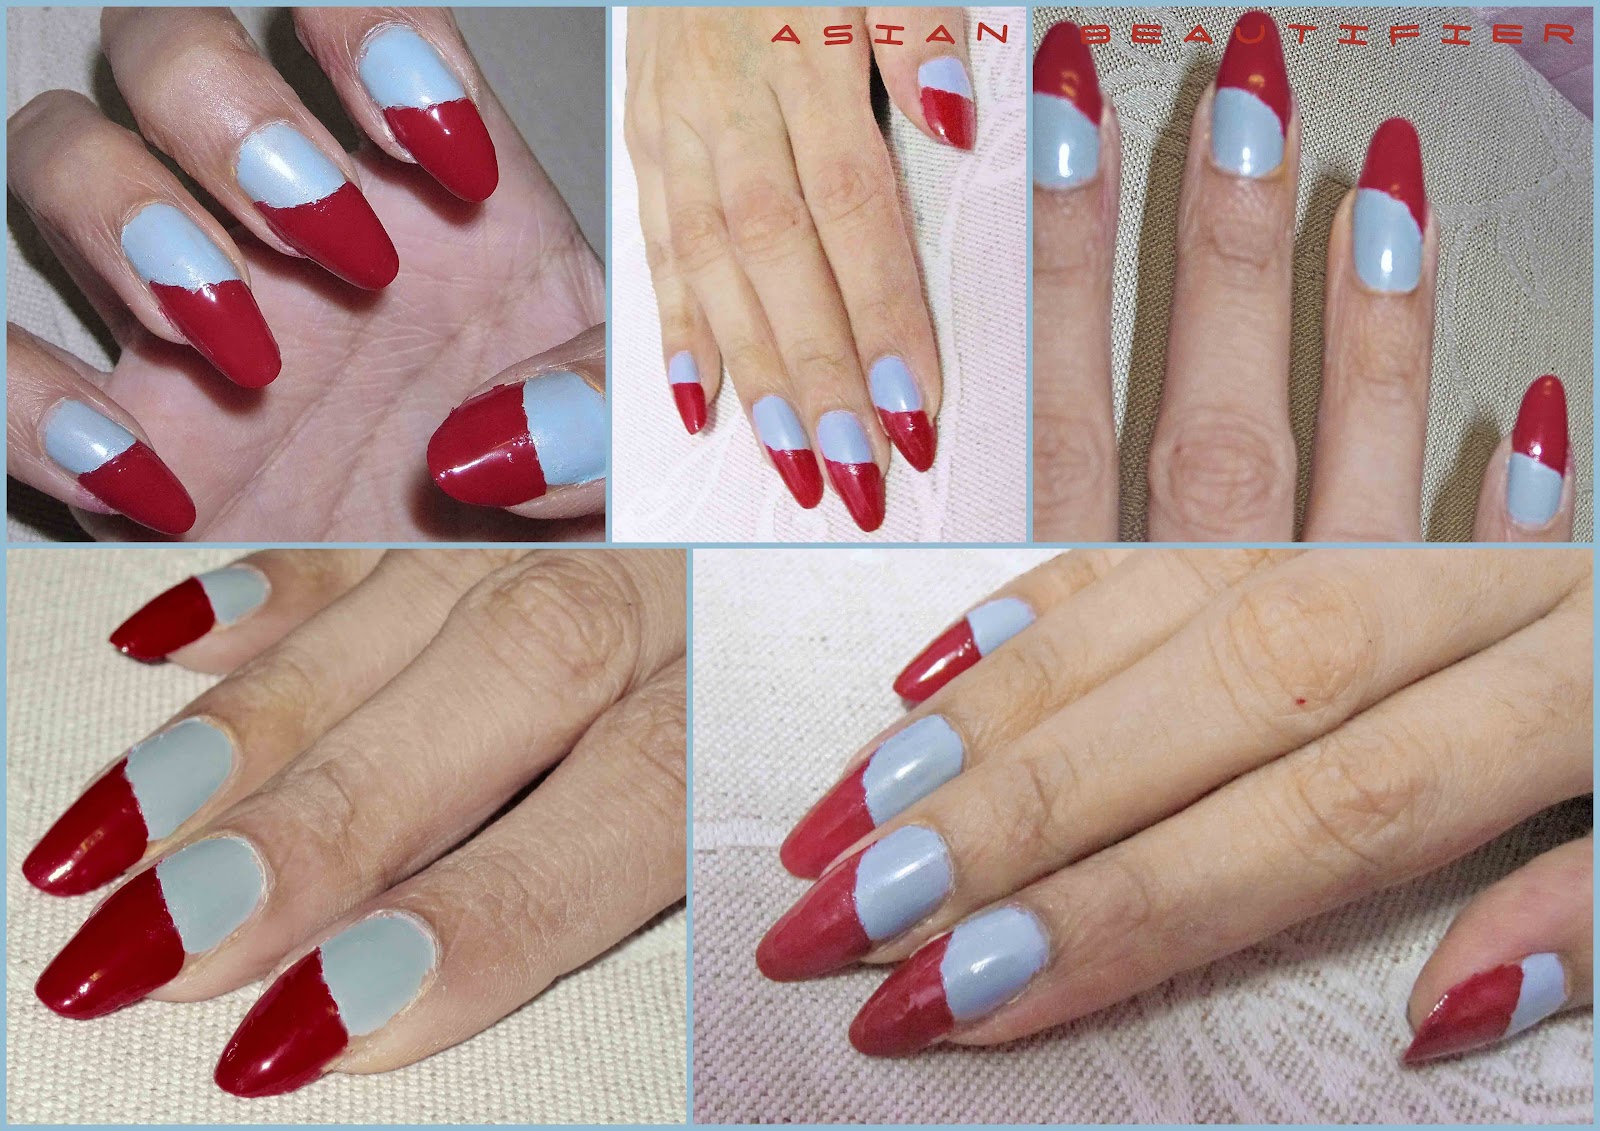
Today I had a bit of time in my hands so I decided to play with my nails by going in for a simple DIY nail art using the two gorgeous brand new shades from Eyeko Polishes - Eyeko Rain Polish for City Nails and Eyeko Saucy Polish For Naughty Nails!


A list of what I used for my DIY nail art...
  • Eyeko Rain Polish and Eyeko Saucy Polish (Price £3.50 per bottle)
  • Nails Inc Base and Top Coat

  • Allura Nail Guides (available at Poundland)


Easy Step by Step to my DIY nail art...


Step 1: Applied Base Coat on my bare nails and then allowed it to dry. Peeled off the nail guide strip.
Step 2: Placed the nail guide in a diagonal way on top of my nails
Step 3: Carefully applied a coat of Eyeko Rain Polish on the first half of the nail. Waited for it to dry for 3-4 minutes and then carefully removed the nail guide.
Step 4: Carefully Placed the same nail guide just before the end of the diagonally created line of the Eyeko Rain nail polish. Then applied a coat of Eyeko Saucy Polish on the second half of the nail. Waited 3-4 minutes for it to dry and then carefully removed the nail guide to finish off the design.

So that was a simple and easy to follow nail art design using two of the latest Eyeko polishes that looks really cool even when worn alone on nails!

Thanks for dropping by xoxo

Disclaimer: Eyeko Rain Polish and Eyeko Saucy Polish were sent to me by the Eyeko PR. I did not receive any monetary favors for doing this post.

Saturday, 1 May 2010

NOTD: Eyeko Cosmic Polish and Some Blog Awards!

Hey Everybody!

Today I am wearing twin coats of Eyeko Cosmic Polish (for Space Age Nails) and I am loving it [p.s. please excuse me for the dodgy application :)]! It is a glossy black nail polish with a lot of tiny multi colored glittering particles which add a 3dimensional look to it! I was lucky to win this in Shifa's giveaway along with other goodies!


So what are you all Nailsporting these days? I sure would love to know!

Going on to other things, blog awards specifically, I was tagged by the gorgeous Nada of Arabian Eyes for a total of three Blog Awards, the first being the 10 Tag Award:-


The rule for receiving this award are to post 10 things that makes you happy, now I have done a similar post on seven things that makes me happy, so for this post, I would be adding in 3 more things in addition to the seven things that I've already posted, to complete the 10 things tag. So here goes the 8th thing that makes me happy.....
8) I love soft cuddly toys, at times when I am feeling a bit low, hugging those softies cheers me up for sure!
9) I love taking pics and making collages, my poor little PC must be cursing me for overloading it with pictures and stuff ha ha
10) Last but not the least, I love sleeping, visiting nice and beautiful places, as these two things recharge me up like anything!

The 2nd one is the I Love your Blog Award:-


And the third one being the Beautiful Blogger Award:-


The lovely Maki has also tagged me for the Top 10 Award with its rules being the same as the Top 10 tag award mentioned in this post.

I now tag all of my lovely readers for these lovely awards! Feel free to post these awards to your respective blogs together with a post on 10 things that makes you happy :))
Related Posts with Thumbnails